How to create a gallery wall
Creating a gallery wall is a fantastic way to showcase your personality and style in your home. Whether you're a seasoned pro or a beginner in the world of interior design, these tips will help you create a stunning horse and country gallery wall that will be the focal point of any room.
1. Plan Your Layout
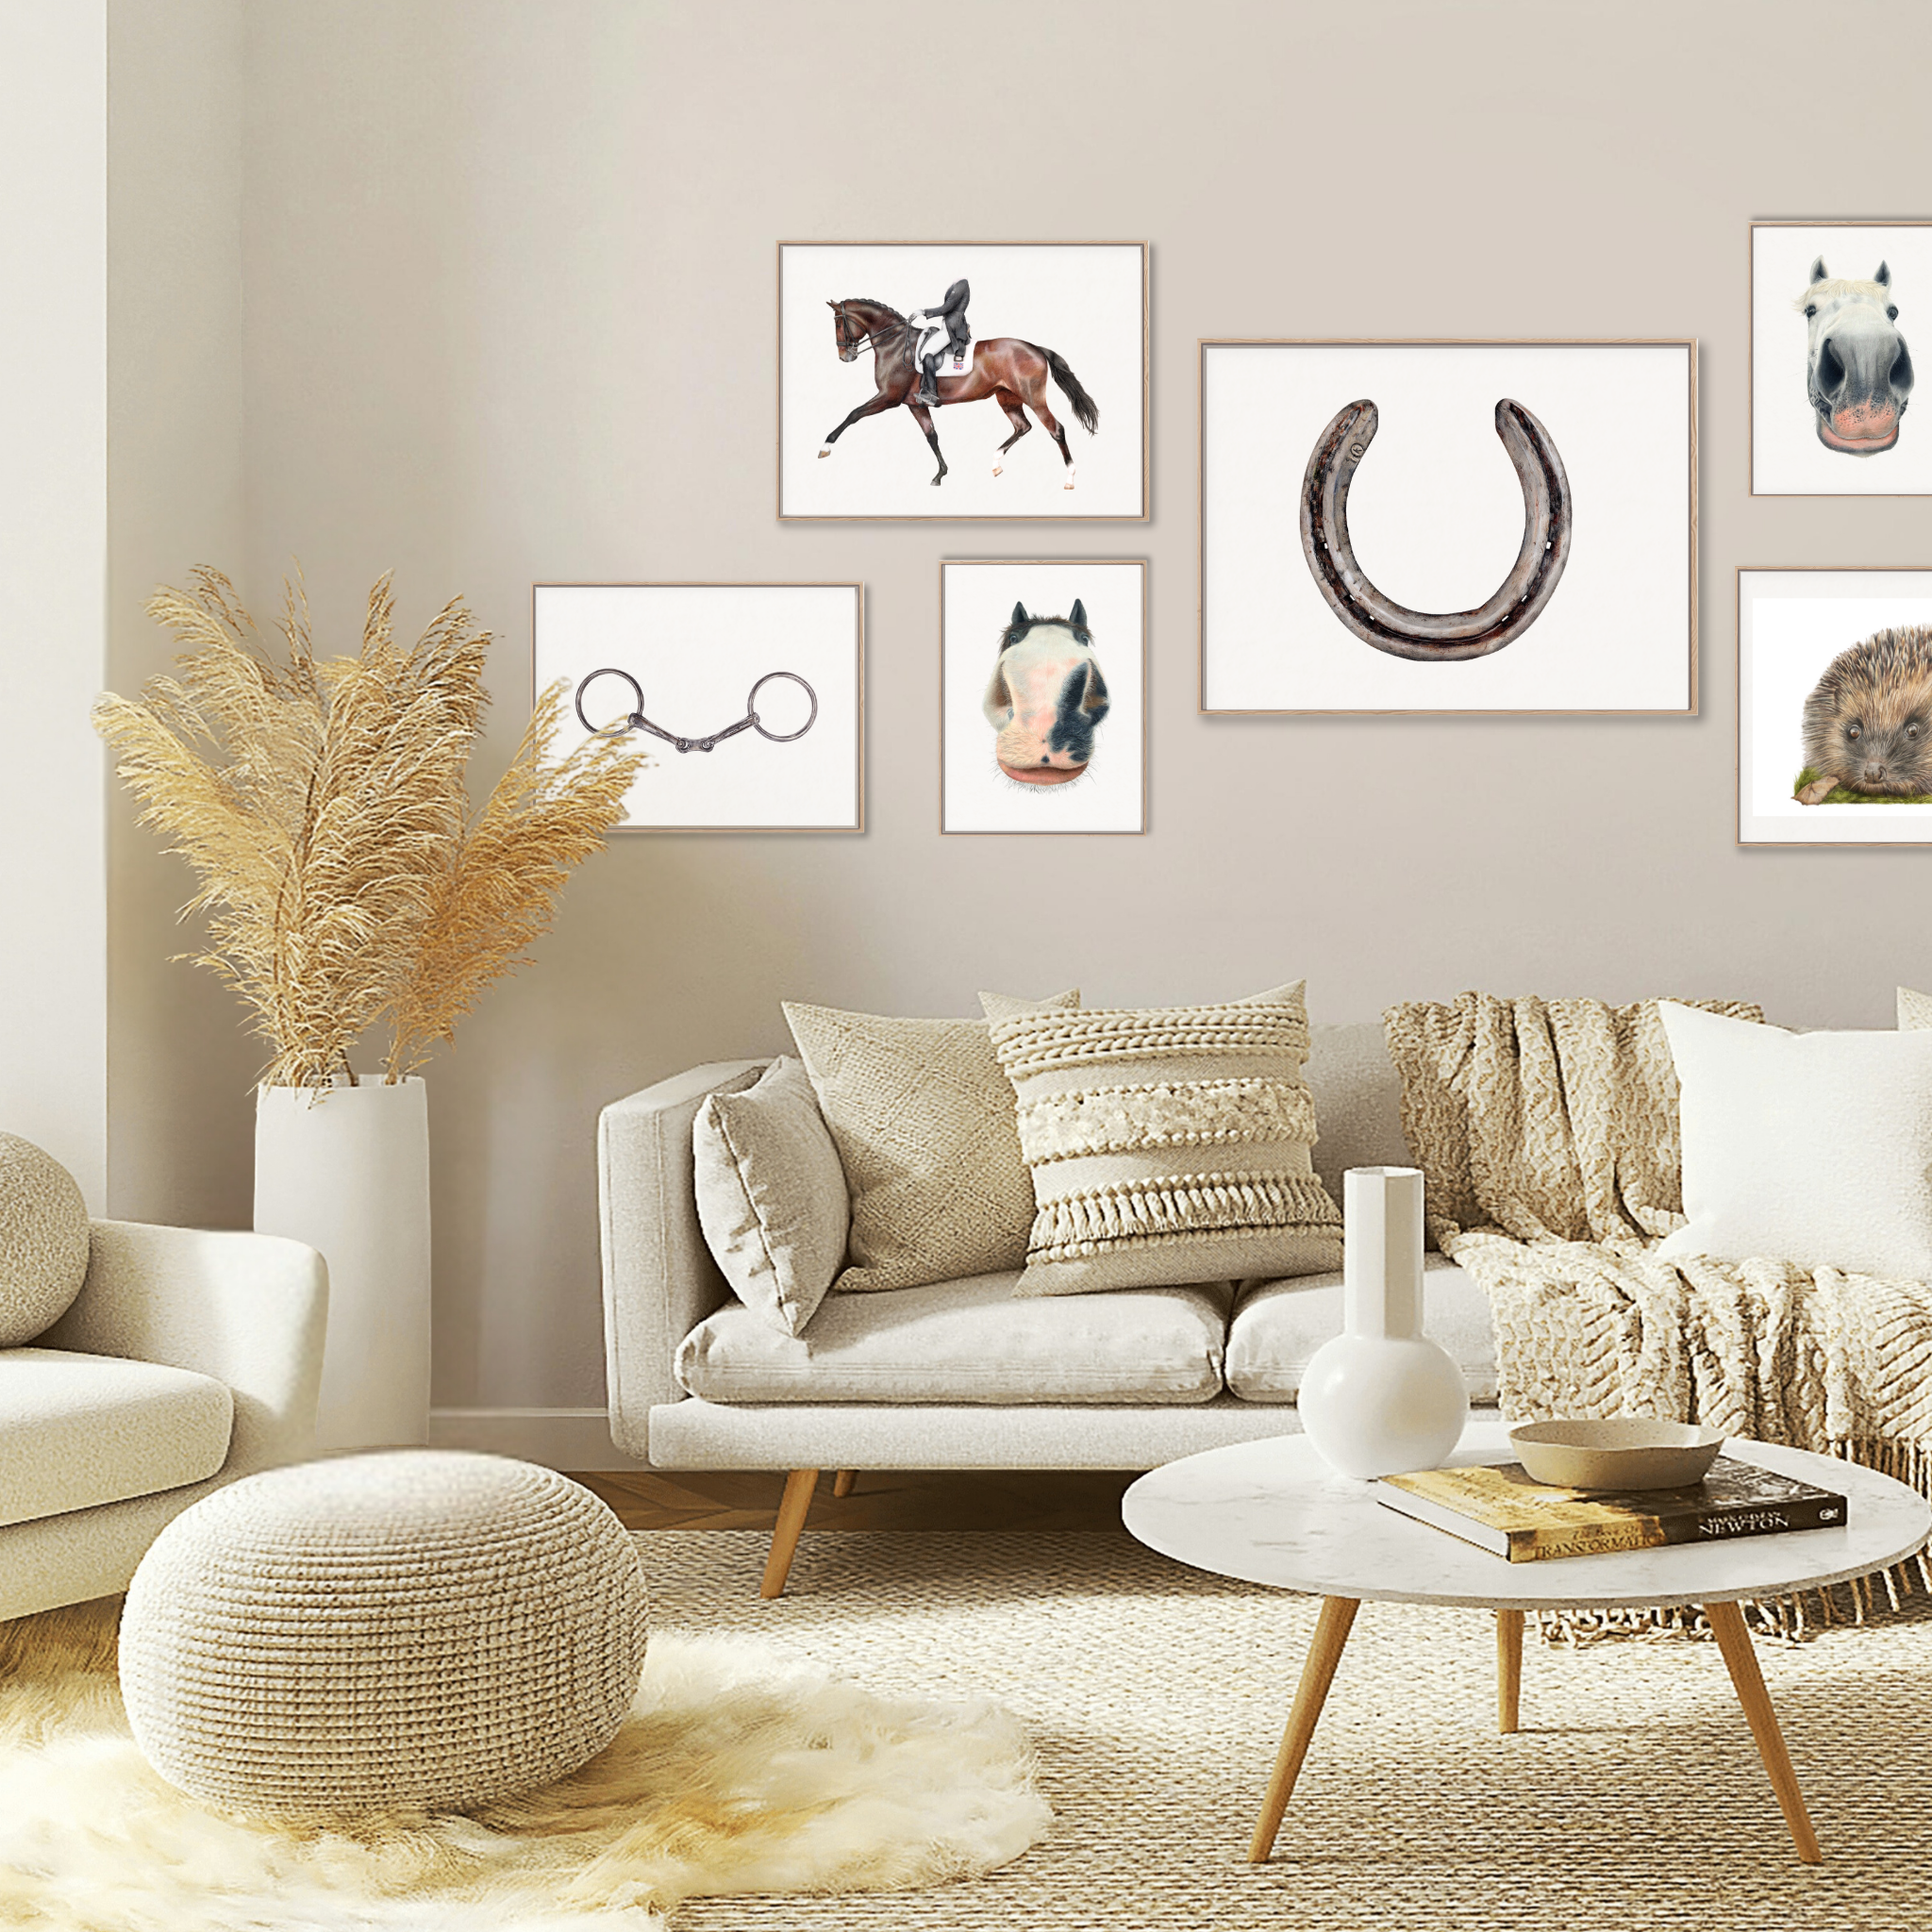
Before you start hammering nails into the wall, take the time to plan out your layout. I have created some gallery wall templates for you to download. The layout will be determined by the size of your prints and whether you want your gallery to be asymmetrical or symmetrical. I personally prefer a gallery wall to consist of a few different sizes (A4, A3 and A2) and go for an asymmetrical style.
2. Mix and Match Frames
Don't be afraid to mix and match different frame styles, colors, and sizes. This eclectic look adds visual interest and personality to your gallery wall. Just make sure to maintain a cohesive colour palette or theme to tie everything together. Be aware that if you go for a frame and mount, it will add 5-10cm onto the size of your print.
3. Create Balance
Balance is key when creating a gallery wall. Make sure to evenly distribute the visual weight of the artwork across the wall. You can achieve balance by mixing different sizes of art pieces and spacing them out strategically. I would always start in the middle and work your way out.
4. Add Variety
You could include a variety of art mediums in your gallery wall, and mix your horse and country prints with personal photos of you and your family. If you are a keen horse rider, you may want to frame some of your rosettes if competing is important to you and add a 3D element to your wall. This variety adds depth and texture to the display if you like eclectic mixes.
5. Consider the Eye Level
When hanging your artwork, aim to have the center of each piece at eye level. This ensures that the gallery wall is easily visible and can be enjoyed by everyone in the room. If you have multiple rows of art, start with the center row at eye level and work your way up and down from there.
6. Test first!
It's definitely a good idea to lay out your prints on the floor first, to give you an idea of the layout before putting holes in the walls. Then there are a few hacks to help you get the nail correct the first time. My favourite one is to put a dab of toothpaste on the back of the frame, press the frame against the wall and you will be left with a tiny bit of toothpaste where the nail needs to go. Simply wipe the toothpaste off the wall once you've put your nail in!
Share